Creating buttons
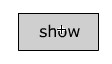
| Click on Insert and then New Symbol... Call the new symbol show and select the Button behavior. When the symbol editing window opens in place of the stage, add a small static text box in the centre and enter show into it. Rename the layer text. Create a new layer, name it background. Select the rectangle tool and use it to draw a border and background around the text. This will define the area of the button. |
 |
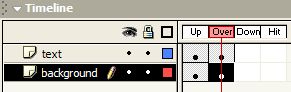
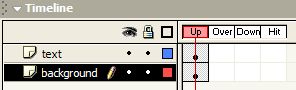
The timeline for a button is different in that it only has four frames. Each frame defines what the user sees when interacting with it. Up - is the frame shown without any interaction and so contains the image that the user sees most of the time. Over - this frame is entered by the movie if the mouse passes over the button. Down - is the frame shown if the mouse button is pressed over the button. Hit - this frame defines the area of the button that can be clicked on. |
 |
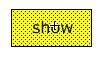
To keep this first button simple, you will only define two states; Up and Over. Insert a Keyframe in the Over frame for both text and background layers. Now select the Over Keyframe in the background layer and click on the filled rectangle on the editor. You might have to click on a blank bit of editor first to deselect the rectangle's border. Use the properties pane to change the fill colour. This means that the user will see the colour of the button change when they pass the mouse over it. This will confirm that it is a button and they will get an irresistible urge to click on it! |
|
Hold down the Ctrl key and tap the E to finish editing the symbol and to return to the stage. I bet you've been wondering what the controls layer was created for all that time ago. Click on frame 1 of the layer and press F11 to open the Library and drag a copy of the show button onto the stage in the controls layer. |
 |
To activate the button, you need to add some ActionScript to it. Click on the button and then press F9. Enter this:
If you have added other labels for other hotspots, include the extra instructions inside the curly brackets. In (fairly) plain language, it means -
Test the movie and check that the button changes colour in response to the mouse and that the labels appear when you click and release. |
|
Finally, create a second button symbol. The quickest way to do this is to duplicate the symbol show. Right-click on the symbol in the Library to do this. Call the copy hide and then double-click on it in the Library to edit it and alter the text in the button. Add code to the new button to hide all the labels when it is clicked. An alternative is to use a new bit of ActionScript to test if the labels are visible and hide them if they are. This means that one button can both show and hide the labels. if (_root.spearlabel._visible == true) { Have a go if you want but the ActionScript syntax in the code is beyond the objectives of this lesson. |
|