Using visibility
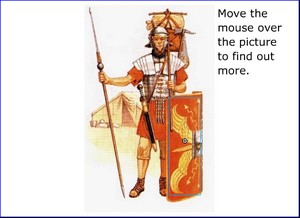
| You are going to alter the lesson 2 movie so that separate information labels appear when the user moves the mousepointer over parts of the image. This also creates an opportunity to create a button that will reveal all the labels at once. Save the Flash file under a different name (e.g. lesson2b) so that you can go back to the original and modify it at a later date. You will keep most of the original but double-click into the Dynamic Text box to add a static instruction and convert it to Static Text using its properties. Unlock the background layer and nudge the image into the centre of the stage before locking it again. |
 |
You will find that the hotspots are now in the wrong place so nudge them back over the image. If you can't find them all (since they are invisible), click on the hotspots layer and they will appear with blue borders around them. |
|
Make sure that you are working on the labels layer by clicking on its first frame and then select the text tool from the toolbar. Drag out a text box near to the shield. Type some suitably informative text into it. Set the box's properties to be static text. Unfortunately you cannot alter the visibility of text boxes so, the next step is to convert it to a symbol. |
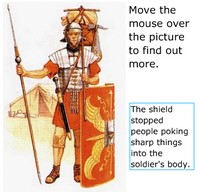 |
Check that the new label is the only object selected and press F8. Call the new symbol shieldlabel and set its behavior to Movie Clip. Use its properties to name the instance of this new symbol shieldlabel. This will be the one and only copy of the symbol on the stage and so it is okay to use the same name as you used for the symbol. You are naming it because it will be referred to in ActionScript later on. |
|
Click on frame 1 of the scripts frame and press F9 to bring up the Actions pane. Delete the line that created the labelText variable and insert the following in its place.
When the movie runs, this instruction will hide the label by making it invisible. Test the movie to check that this happens. |
|
Now you must adapt the ActionScript that runs when the user moves the mouse over the shield hotspot to make the label appear. Click on the shield hotspot and press F9 if necessary to make the Actions pane appear again. Edit the code so that it reads as shown below.
|
|
Test the movie and see if it does as it is told! All you have to do now is adapt the instructions to add labels for the other hotspots you created and to make them appear and disappear. The next step is to create some buttons to reveal all the labels and hide them again. |
|
