Working with a symbol
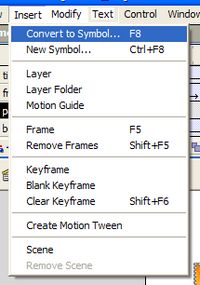
| You are now going to animate the pasta by making it fade in and out as the movie plays. Click on frame 1 on the pasta layer. Check that the image is definitely selected and then click on Insert and then Convert to Symbol... in the sub-menu. Symbols are objects in the movie just like all the other things that you have placed on the stage. Their special feature is that they are placed in the movie's library and you can add copies (called instances) of symbols to the stage without adding to the size of the final movie file. You can also edit a symbol and all the instances of it in the movie are automatically updated. |
 |
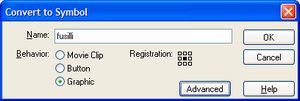
A dialog appears. Use it to give a meaningful name to the symbol (e.g. fusilli!) and select its behaviour. You will learn more about behaviours in lesson 2. For now select Graphic and then click on OK. |
 |
The only change that you will notice is that the pasta has a blue selection box around it instead of the grey one. However, you can now alter the object in some new ways. |
|
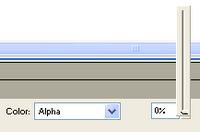
Insert a Keyframe at frame 40 and frame 80 of the pasta layer. Click on frame 1 of the pasta layer and then click on the object on the stage. Use the symbol's properties at the bottom of the screen to chage the color alpha property to 0%. The alpha property sets the object's opacity. In this case, you have made it completely transparent. |
 |
Repeat the procedure for frame 40 in the pasta layer, but set its alpha to 100%. Finally, move to frame 80 and set the symbol's alpha property to 0%. If you watched the movie now, the pasta would start off invisible, suddenly appear half way through and then just as suddenly disappear. To make it fade in and then out, insert a motion tween between each keyframe. Try the movie and then see if the effect is better if the pasta fades the opposite way as it plays by changing its alpha property on each keyframe. You could have the symbol partly visible at frame 40. Click on Next to add one more animation. |
|
