Reveal
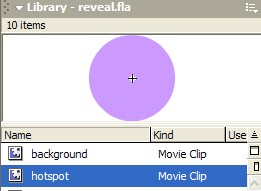
The hotspot in the library is just a coloured shape. Instances of it are placed on the stage to cover areas where you would like the mouse to produce an effect. Code is then added to the hotspots to make this happen.
The hotspot in the example file is an oval but it doesn't matter what it is. Your diagram might have more regular areas that would suit rectangular hotspots, in which case, edit the shape in the library.
The only reason that it is coloured is to that you can see where you place it. All the hotspots will become invisible later.
You can also have more than one hotspot movie clip in the library (hotspot1 - an oval, hotspot2 - a rectangle etc), create a duplicate of the original and name and edit the duplicate as you wish.
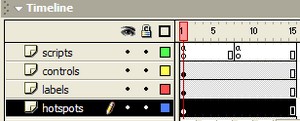
- Make sure that you are working in the hotspots layer and consider locking other layers for safety.
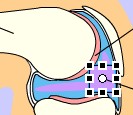
- Drag an instance of your chosen hotspot movie
clip from the library onto the stage to cover
the part of the diagram you want to make active.
- Use the free transform tool to select the hotspot and alter its size and shape to cover the area appropriately.
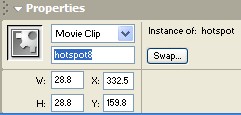
- With the hotspot still selected, go to the
properties window and name it using the convention
shown (hotspot1, hotspot2 etc). This allows you
to refer to each one in code.
- Remember that if you are adapting the template, you will need to delete or edit the existing hotspots already on the stage. However, you might want to do the next step before deleting them all as they contain some important code that you will want to copy first.
- Check that one of the original hotspots is
selected.
- Make sure that the action (code)
window is visible (F9 toggles
the window on or off).
- Select and copy the code.
- Select a new hotspot by clicking on it on the
stage or go straight to its code by using the
list at the top of the code window.
- Paste the code into each hotspot.
- Hide the actions (code window).
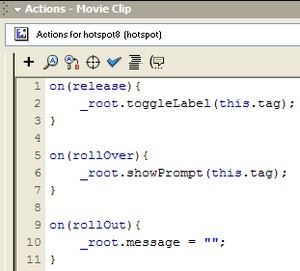
The code calls functions on frame 1 of the scripts layer. These functions show a prompt in a text box if the mouse is moved over the hotpsot (rollOver) and toggles the label's visibility if the user clicks (release). It also takes care of tidying up the prompt when the mouse moves away from it (rollOut).
Repeat the above steps until you have all the labels and hotspots you need for the activity.
The only think left to do is to edit some of the code on frame 1 of the scripts layer.