LMS - eXe Learning
Learning activities are packaged up in a single file that is uploaded to the VLE. Many content authoring packages use a zip file as this package. The zip contains the activities along with all the other files that the VLE needs to run them. All the processing is handled by the authoring system.
The standard format for the package is called scorm. This section steps through using the eXe Learning content authoring package. It allows us to add our own Flash content while producing all the dependent files to make the package scorm compliant. In short - it should work without our having to worry about how it works.
eXe Learning can be downloaded from here.
Obviously, eXe does a lot more than just package up files. The eXe Learning online manual can be found here.
An Adobe reader version of the page (pdf) can be downloaded here.
Once you have downloaded and installed eXe, open the program.
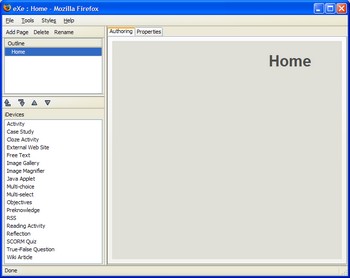
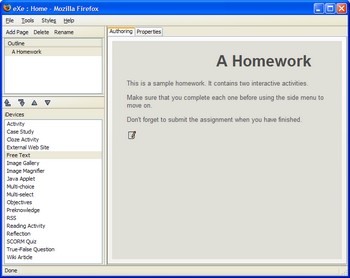
The screen has a small window to organise pages in the activity (Outline - top left), a larger content window (Authoring - right) and a list of inbuilt activities that can be inserted (iDevices - bottom left).
We will start by placing a couple of instructions on the Home page as well as changing its name so that it is appropriate to the task.
The tutorial will then take you through inserting the sample cloze and drag and drop produced by the basic templates. It will use the standalone cloze version as this is more straight forward. Additional instructions for adding the cloze version with separate text file can be found here.
Finally it will describe how eXe creates the package file.
- Get organised by creating a folder for this project.
- Either use Flash to create swf files of the two templates or download them from the links on the right. Use right-click to download them or they will load in your browser.
- Give the files meaningful names and drag them into your project folder.
- Back in eXe, click on File > Save As and save the project in your folder e.g. as test_package. It is a good idea to avoid spaces in filenames wherever possible when you intend to upload files to the web.
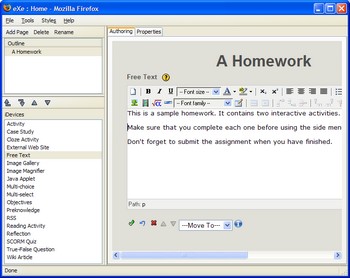
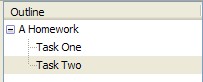
- Now, to edit the Home page. Click on the page name in the Outline window to select it and then click on the Rename button above it. Enter an appropriate name e.g. A Homework.
- Next look down to the iDevices window and select Free Text. An editor appears on the Authoring page.
- Enter a short introduction to the activity and some instructions for the student. Note that you can add images and format the text using the toolbar at the top of the editor.
- Click on the green tick at the bottom of the editor when you are finished.
- You can go back and alter the page at any time by clicking on the paper and pencil icon below the text. This takes you back to the edit window.
- Save the project.
This process is basically the same for all the iDevices in the list.
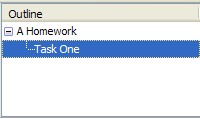
Now we will create a new page and insert one of our Flash movies onto it.
- Click onto the title page, in this case A Homework.
- Click on the Add Page button at the top of the Outline window.
- The outline tree will show the new page as a branch from the title page.
Now to add the cloze activity to the new page.
- Click on the new page to select it.
- Use the Rename button to rename the page.
- Select the Activity iDevice.
- An edit window will appear on the page.
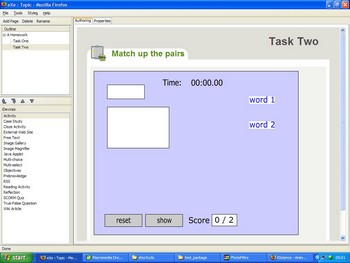
- Click into the title box at the top and add a title or short description for the task.
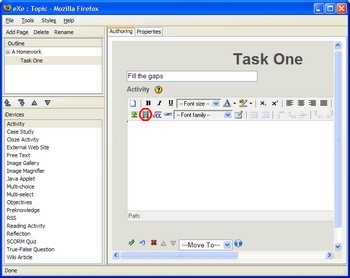
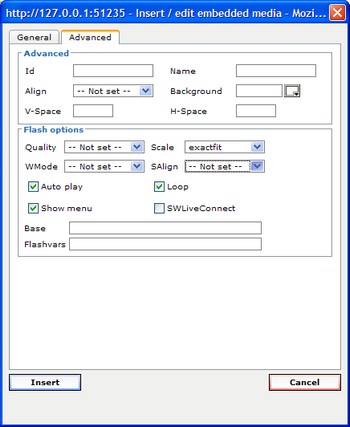
- Click on the Insert / edit embedded media button in the toolbar (the film icon circled on the screenshot above).
- Set the media type to Shockwave Flash.
- Use the browse button (circled red on the screenshot right) to find the cloze flash file in your project folder. Make sure that you select the .swf.
- Set the dimensions of the movie. If you are not sure about the size, try 640 x 480 or 800 x 600.
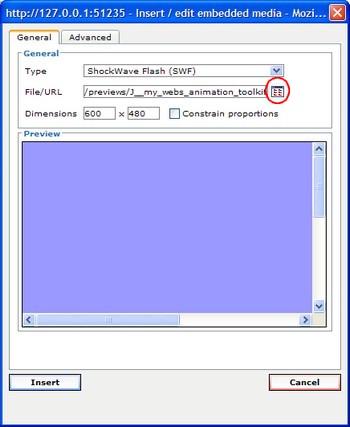
- Click on the Advanced tab at the top of the insert window.
- Check that the Auto play option is ticked.
- Click on the Insert button to add the movie and go back to the edit view of the page. The Flash movie should be displayed and you can check if the size seems to be appropriate.
- Finally, click on the green tick button to close the editing view and complete the page.
- Save the project.
To complete the job, use the instruction above to create a second page attached to the title page, rename it and insert the drag and drop flash movie.
You might want to have a play at inserting more pages to see what the other iDevices look like.
One point to note is that the Scorm Quiz is the only one that reports the score back to the LMS.
eXe is quite happy for you to insert activities gererated by other applications. Click here if you want to find out how to insert a Hot Potatoes activity.
You should then save the eXe file one last time.
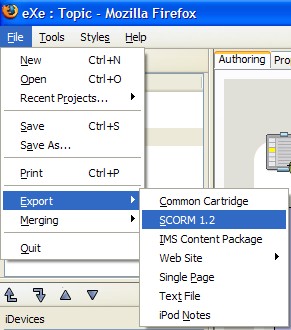
Okay, the final job is to generate the LMS friendly package to upload and try out.
- In eXe, select File > Export > SCORM 1.2.
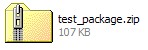
- Use the file dialog that appears to save the package file in your project folder. The program will automatically add the extension .zip to the filename you choose. Again, it is good practise to avoid spaces in the filename.
- eXe takes all the references to the Flash files and anything else you have inserted onto its pages and puts everything into the zip. You don't need to worry about keeping the files in the same location nor do you need to upload them separately. You only need to upload the zip file to your LMS.