Setting up the stage
|
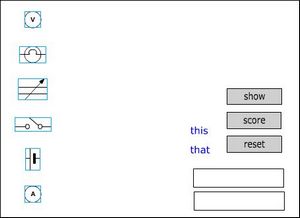
Create a new layer and call it background. Drag the layer so that it is at the bottom of the stack (below the boxes layer). Click on frame 1 in your background layer and then import your images, one at a time to the layer. You can do this by scanning a document into your favourite graphic editor and then copy and paste images directly onto the stage. Arrange your images so that they have a space beside them for their matching descriptions or names. |
You might want to drag the other objects away from the images at the same time. |
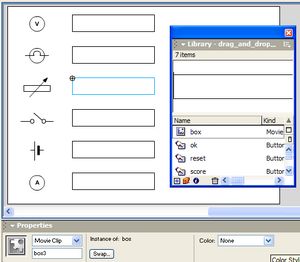
Now position the two boxes that were there at the start beside the first two images. Next open the library by pressing F11 and drag some more boxes onto the boxes layer and arrange them beside the rest of the images. The first two boxes should have been named box1 and box2. Select each new box and in its properties, name it - box3 etc. Naming the boxes enables Flash to refer to the symbols in code. The boxes might not be the appropriate shape or size but leave them as they are for now until you have created the text labels. |
 |
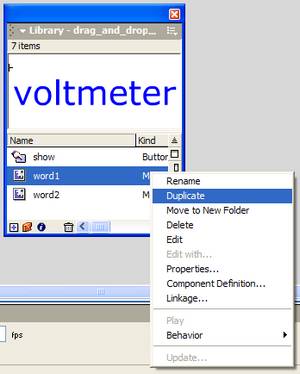
Click on one of the existing words and hold down Ctrl and E to edit it. The word symbol has two layers, one for the text and the other for the background that gives the mouse something to click on between the letters. Click on the first frame of the text layer and then edit the text to contain the words that you want (the image shown was zoomed it). Click on the first frame of the background layer so that this is selected. Select the Free Transform Tool and use it to drag the background rectangle to cover the whole of the text. |
 |
Click on the link to Scene 1 to finish editing the label and go back to the main timeline. |
|
Repeat the exercise with the second word. Now you will need to create text symbols to match with the other images. One quick way to do this is to open the library and right-click on one of the existing word objects. Choose Duplicate from the menu that appears. In the Duplicate Symbol dialog, name the new symbol word3 and then OK. The new symbol will be placed in the library and it can then be dragged to the words layer, edited and positioned. Repeat this until you have text labels to match with all the images. Finally, click on each symbol inturn and name it in the properties pane word3, word4 etc. |
 |