Animating the text
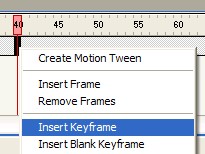
We will start by creating two special frames to act as markers for the text animation. These special frames are called Keyframes. Right-click on frame 40 in the title later and select Insert Keyframe from the menu that appears. |
 |
You will see a distinctive frame with a central circle appear (just like frame 1 which is automatically a Keyframe). When you create a Keyframe in a movie, any objects that were visible on the stage in a previous Keyframe (frame 1 in this case) are copied to the new Keyframe. The idea of a Keyframe is to create a point where something new happens or where something stops happening. Create a Keyframe at the last frame in the title layer - at frame 80. |
|
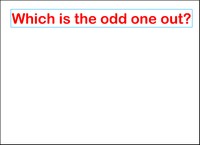
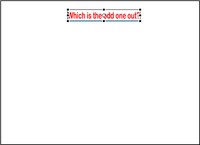
The idea is going to be to make the text shrink and move between frame 1 and 40 and then grow and move back between frames 40 and 80. Click on Keyframe 40 to select it. Drag the text to the top of the stage. |
 |
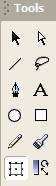
If you now click on Keyframes 1, 40 and 80, you should see the text jump from the bottom to the top and then back again. Now to change its size. Click on Keyframe 40 again. Select the free transform tool by clicking on it in the toolbox or by pressing Q. |
 |
The text will now have black handles around it and you will find that you can change its size by dragging on them. It's worth mentioning that the same tool lets you rotate objects, hover the mouse near to a corner and the pointer will change to indicate the rotate function. Make the text smaller by dragging it inwards and then drag it back to the middle of the stage. |
 |
Finally, to make the text animate rather than jump, left-click on a frame between 1 and 40 (but not either of these frames). Look down to the properties pane at the bottom of the screen for the Tween list control. Select Motion from the list. The frames between 1 and 40 now show an arrow, this indicates that the object on the stage will be animated bewteen them. Now click between frames 40 and 80 and add a motion tween for the second half of the movie. |
 |
To test the animation. Click on Keyframe 1 and then press the enter key. Flash previews the movie and you will see the text grow, move and then shrink. The next page shows you how to add more objects to the stage and how to animate them in different ways. |
|
