Drag and Drop - Information
Here is what we are aiming for after this step in the tutorial.
If you would rather work from paper - download a pdf of this page from here.
The last stage to adapting the template involves copying a set of targets for the labels to drop in to and adding the code so that the movie can check if the user has got it right.
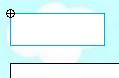
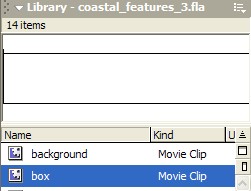
The stage already has two boxes on the stage together with the movie clip (box) that defines them in the library.
The boxes are different sizes but unlike the word movie clips, share the same library symbol . A library movie clip defines various features but some of them can be adapted in copies (instances) on the stage.
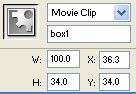
- Click on the box at the top so that it is selected.
- Look at the Properties window
and note that it has been given a name in the
same way as the text labels. The instance name
is referred to in code so if an object doesn't
behave properly, a useful first check is to make
sure that it has the right instance name.
- If you look at the Timeline window,
you will also notice that the box is in a layer
called boxes. This is important
because it ensures that the words appear on top.
- If you tap F9 to bring up
the code window for the box (box1),
you will notice that it does not have any. The
boxes are simply dumb targets that sit wherever
you put them waiting to have things dropped in
them. This makes this section a bit easier than
the last one because each box can be a copy of
the same movie clip, you don't need to duplicate
it to produce a set of individual movie clips.
- Press F9 again to close the code window.
![]()
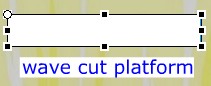
- Check that box1 is still selected
(look for the pale blue box) and drag it over
to the label that says wave cut platform.
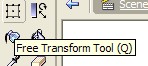
- Click on the Free Transform Tool in
the toolbar and then use the handles that appear
around the box to drag it so that it is just
a bit bigger than the text label.
- Now drag the box to a suitable position on
the background image so that it labels the wave
cut platform (see the finished movie above if
you are not sure). You might find that you have
to change the position of some of the text labels
at this point.
- Repeat all this for box2 so that it fits the word2 label (arch). It is up to you if you make all the target boxes the same size (that of the biggest text label) or make the task easier by fitting them to the word they have to accommodate. If you decide to make them all the same size, click on box1 and check its size in the Properties window and then select the other boxes and type in the same width and height into their properties.
- To produce the other three target boxes, make
sure that the library is visible by pressing F11.
If that just made it disappear, press it again
- the key works as a toggle!
- Check that you are working on the boxes layer
by clicking on frame 1 in that layer.
- Click on the box movie clip
and drag it onto the stage. This creates an instance
of it.
- Name the instance box3 in
its Properties window.
- Use the instructions above to resize it to
fit word3 or make it is the
same size as the rest if you prefer.
- Position it to label the stack.
- Repeat these instruction for the other two target boxes.
If you test the movie (and you should), you will see that the text labels allow themselves to be dragged into boxes and they mysteriously know which box is the right one. The code looks for all the text labels (word1, word2 etc.) and all the target boxes (box1, box2 etc.) and then assumes that word1 goes in box1 etc. You can edit the code to make it do something different but for the majority of situations, this should work without you needing to.
- Click on frame 1 of the scripts layer and press F9 to bring up the code window. Scroll down until you find the code shown below.
answer[1]
= 1;
answer[2] = 2;
answer[3] = 3;
answer[4] = 4;
answer[5] = 5;
answer[6] = 6;
answer[7] = 7;
answer[8] = 8;
answer[9] = 9;
answer[10] = 10;
Each line uses the same convention to define which text label matches with which target box.
answer[1] = 1; means "the answer for text label 1 is box 1;
Leave the code as it is (even if you haven't got 10 labels) unless you need to.
Check the movie (and your physical geography). If you don't get 100% when you click Score, you might have named the words or boxes differently or you might not know the correct answer. Either way, you then have the difficult job of working out where things have gone wrong. Use the Show button to see where the movie things the answers should go and then go back to the last bit of code to sort it out.
You now have a working drag and drop activity. You might want to save it as a new template file to save you time if you want to produce another, similar task. A template with eight text labels and target boxes and all the working code can be used to knock up an activity quickly by editing the text, swapping the image and deleting any spare parts.